
I. Guide
Everything in one place.
Using dom.io
From first connection to daily use — rooms, scenes, the security view, widgets, and push alerts. This is the complete guide to getting the most from dom.io.
II. Connecting
Connecting to your Indigo server.
dom.io talks directly to your Indigo server — no cloud intermediary for device control. On your home network it connects locally; when you're away it routes through Indigo Reflector.
API key & Reflector ID
Your API key is in Indigo's preferences under Network → API Keys. Your Reflector ID is the subdomain shown on the same screen — it looks like a short word or phrase. You'll enter both in dom.io on first launch.
Local connection
When your iPhone is on the same WiFi network as your Indigo Mac, dom.io connects directly over your local network. It's fast — typically sub-100 ms — and bypasses the Reflector entirely.
Remote via Reflector
When you leave the local network, dom.io automatically switches to Indigo Reflector — Indigo Domotics' secure relay service. The same API key and Reflector ID work everywhere; no VPN or port-forwarding needed.
Auto mode
In Auto mode, dom.io probes the local network at startup and uses it when reachable, otherwise the Reflector — and re-checks as you come and go. You can lock it to Local or Remote in Settings if you prefer — for example, to force local-only access at home.
The Local Secret field
Most setups don't need it. Your API key already works on the local network, so leave Local Secret empty and dom.io uses the API key for both local and remote — that's the simplest, most reliable choice in Auto mode. Only fill it in if you've deliberately configured your Indigo server to require a separate local secret.
III. Organisation
Rooms, categories, and favourites.
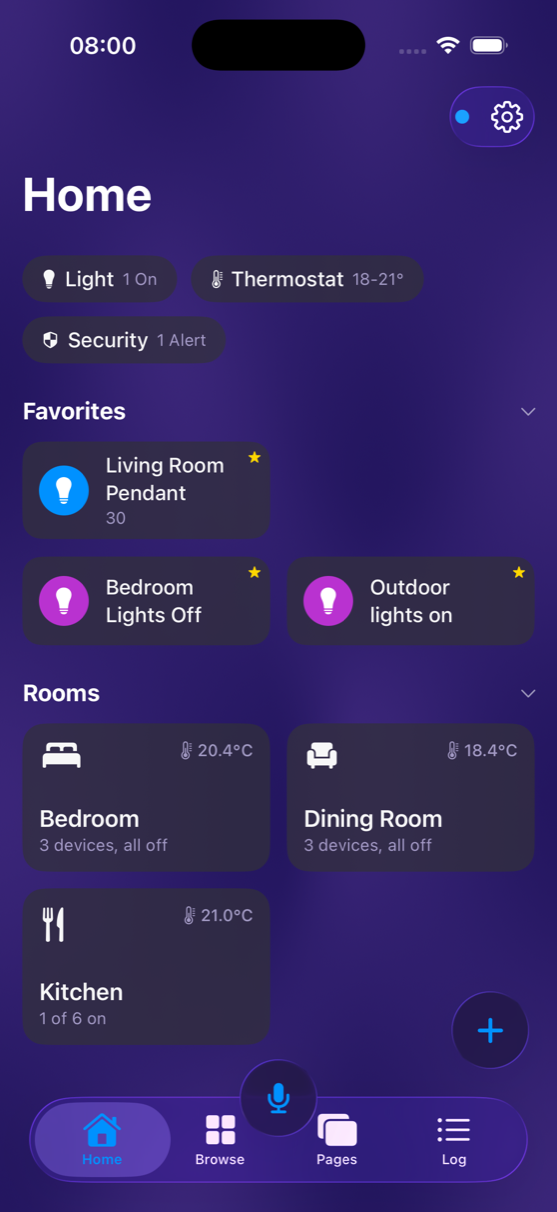
dom.io starts with your Indigo devices and lets you shape how they appear. Assign devices to rooms, pin the ones you reach for every day, and use category pills to filter by type.
Rename or delete a room
Long-press a room card to see its options — Rename to change the name, Rearrange Rooms to enter drag-to-reorder mode, or Delete Room to remove it. Devices in a deleted room move to Unassigned.
Favourites
Long-press a device card and tap Add to Favourites. Favourites appear in their own section above your rooms — the things you reach for most, one tap away.
Filter by type
The row of pills across the top of the device list filters by category — Lights, Switches, Thermostats, Sensors, Security, and more. Tap one to see only that type across all rooms. Tap again to clear the filter.
Device type
dom.io auto-detects device types from Indigo, but you can override them. Long-press a card and open Device Type to pin a device to a specific category — useful when a generic device should behave as a light or security sensor.
IV. Security
The security view.
Tap the Security pill to see all your security-relevant devices in one place — organised into Doors, Motion, Safety, and alarm panel sections. dom.io populates this view automatically.
What appears here
dom.io scans your Indigo devices and includes standard sensor types — door contacts, motion sensors, and smoke detectors — along with any device whose name contains obvious keywords like "PIR", "contact", "smoke", or "gate". Texecom alarm zones are included automatically and grouped by their zone type.
Alarm zone devices
A small yellow shield on a device row means it's a Texecom alarm zone — its status comes directly from the alarm panel, not from a simple on/off state. These devices show Healthy, Tripped, or Tamper rather than Open/Closed.
Reclassify a sensor
If a sensor appears in the wrong section — say a door contact showing up under Motion — long-press it and choose Set as Door/Window Contact, Set as Motion Sensor, or Set as Smoke/Safety. The change is immediate. Choose Auto-detect to revert to automatic classification.
Add a sensor to security
If a sensor isn't showing up in the Security view — perhaps because its name doesn't match a keyword — find it in a room or via the Sensors category pill. Long-press its card and open the Security submenu. Choose the type that fits and it'll appear in the right section immediately.
Remove a sensor from security
To hide a sensor from the Security view entirely, long-press it and choose Remove from Security. The device stays in your rooms and categories — it just won't appear in the Security view. You can add it back any time via the Security submenu on its card.
V. Widgets
Device status on your home screen.
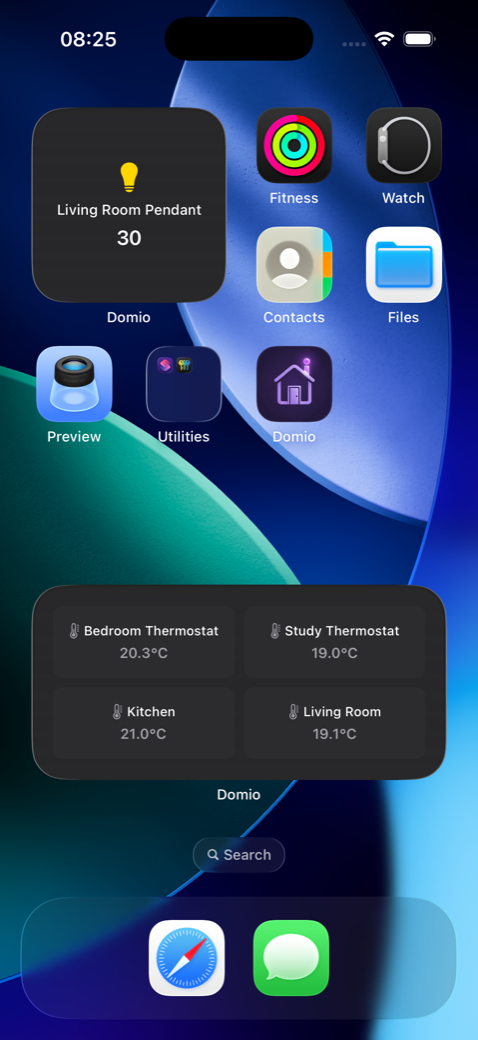
dom.io widgets show live device state on your home screen, lock screen, or in standby — no need to open the app to see what's on.
iOS widget picker
Long-press your home screen, tap the + button, and search for dom.io. Choose the widget size that fits your layout — small, medium, or large — then tap Add Widget.
Choose your devices
Long-press a widget and tap Edit Widget to choose which device or room it shows. The Grid widget shows multiple devices at once — you can pick each slot independently.
Background refresh
dom.io refreshes widget data in the background so the status you see is recent. For the very latest state, open the app — widgets are updated on iOS's schedule, not instantly.
Toggle from the home screen
Relay and dimmer device widgets are interactive — tap the widget to toggle the device without opening the app. (Requires iOS 17 or later.)
At a glance
The grid widget shows up to six devices in one block — handy for a quick read of the whole house before you leave in the morning.
VI. Notifications
Know the moment something happens.
dom.io delivers native iOS push notifications from your Indigo triggers — no third-party services and no subscription. A door left open, a temperature out of range, an automation that ran. Tap to jump straight to the device or scene.
Push notifications require the dom.io Push plugin on your Indigo server, which is a one-time setup.